Relocating to a new home can be an exciting moment. But it also causes a lot of stress. One of the culprits of that angst is packing hundreds of items and avoiding the disaster of a box of broken plates. The best way to tackle your move is to do it one room at a time and stay organized. So in this article, we’ll address the most complex room in the home: the kitchen. This guide will share some simple steps on how to pack kitchen items.
We’ll explain how to prepare and organize your kitchen packing. We’ll also share tips on safely storing your most precious (and expensive) kitchen items.
Why Organized Packing Matters
It pays to spend time arranging your packing. It will keep your kitchen items safe and secure during the move. Kitchen items contain lots of fragile and sharp pieces.
That could mean breakages or injuries to the person moving boxes. Electrical appliances could become damaged. That leaves you with the unexpected cost of replacing expensive items.
Moreover, good packing makes the unpacking process more straightforward. When you arrive at your new home, tired after your move, it will be easier to set your kitchen up and prepare a warm drink or your first evening meal.
Packing Materials: What You Need Before You Start Packing
Organized packing starts with some preparation. Your first task is ensuring you have the right kit, so here is a checklist.
Boxes
You’ll need a range of box sizes for packing. Small, sturdy boxes are best for heavy items such as pans and dishes. When packing light things, you can opt for a large container.
Double-walled cardboard boxes with handle gaps are ideal as they offer extra strength. They’ll also provide padding when packing breakable items such as glass and ceramic.
Protective packing material
Bubble wrap and packing paper help protect delicate and breakable items during a move. They’ll stop things sliding around in boxes, which can lead to damage like chips.
Bubble wrap is the best choice when packing glasses and dishes. Use packing paper to secure boxes and fill empty spaces. That will ensure items stay in place when transported.
Tape and Cardboard
One tricky item to pack is knife sets. The ends of the knives can prove hazardous if they aren’t fully secure. Use tape or glue and loose cardboard and secure sharp utensils and similar objects. It’s a lightweight and safe option.
You’ll also need to buy plenty of packing tape. Ensure you have several to hand if you’ve got multiple people helping you pack. And don’t forget to keep a pair of scissors handy!
Labels
You’ll need a combination of colored marker pens, stickers, and tags for your move.
Tags are the best option for labeling the box so you know what’s inside. However, writing a brief description on the side of the parcel using a marker is also useful.
That will make it easy to identify the boxes when stacked. Color coding using stickers is helpful for grouping and categorizing items. For example, you can choose a color code based on the room.
You’ll also need stickers with a “fragile” warning. It’s the easiest and fastest way to label delicate items.
Create an Inventory
Before you begin packing, take time to make an inventory. You may not want to keep all your kitchen items, and weighing up the cost of moving versus replacing is always useful.
Sort everything into three categories: keep, donate, or discard. You can donate good-quality unused items to a local charity. For broken and worn items, it’s best to discard them to make your move easier.
Cleaning Items
Another pre-packing task to add to your list is cleaning. Always clean kitchen items before moving them. Pans and containers often have debris or grease, which could leave your packed boxes dirty.
The same is true for appliances, so take the time to unplug them and give them a good clean. If devices have detachable parts, remove and pack them separately.
Create a Packing Order
It’s useful to be strategic when packing kitchen items. You’ll want to ensure everyday things are the last items you pack and the first items you unpack.
That way, you don’t have to spend your first night in your new home looking for a plate so you can enjoy a meal. Conversely, leave your rarely used items until last in your unpacking order.
How to Pack Cutlery
Start by packing sharp knives. Wrap the pointy ends in cardboard and secure them with tape. Always wrap each blade individually. And use packing paper to wrap them before adding them to the box.
When boxing knives, label the box to warn people that it contains sharp objects.
For the rest of your cutlery, store them in sets. You can use packing paper or bubble wrap for each collection and secure these with tape or a rubber band. When packing cutlery into boxes, opt for a package with different containers.
Also, ensure you secure any space with extra packing paper.
How to Pack Glassware
You can buy specialist packing boxes for glassware.
These boxes have individual containers for each glass, offering extra security. It’s worth considering if you have an expensive glass set. However, the downside of this is that it works best for uniform glass sizes.
If you don’t have specialist boxes, start your glass packing by lining your box. Use crumbled packing paper to cushion the bottom and sides.
Stuff extra packing paper inside each glass to add additional support and help minimize damage. After, wrap the item fully in packing paper or bubble wrap. Always secure the wrapping with tape.
Start with the heaviest items at the bottom when adding to the box, and work your way up from there.
Don’t leave any space, and add extra packing paper if needed. Remember to label these boxes as fragile. Finally, always ensure these boxes are at the top of a stacked pile when transporting.
Packing Plates and Bowls
As with glasses, start your plate and bowl packing by lining a box with crumbled paper. Bubble wrap works well too. Always wrap each plate and bowl separately.
Wrap diagonally and ensure you’ve left no gaps. Even a small opening in the wrapping could risk a chip. The best way to pack plates in boxes is by lining them vertically. However, you must ensure you have filled any remaining space with packing paper.
After you’ve lined the plates and bowls, top the box with extra paper for another cushioning layer.
As with your glasses, remember to mark this box as fragile. Plates and bowls will be one of the first items to unpack. So ensure you label it well and store it somewhere prominent.
Packing Other Fragile Items
You may have other fragile items in your kitchen, such as teapots, ceramic bakeware, or breakable utensils.
Group these together to ensure you pack them in a box labeled as fragile. As with your other delicate items, wrap in packing paper or bubble wrap, and use extra to fill in the remaining space.
If the items are an odd shape, it’s worth packing small items in one box and then packing that item in a larger container. This adds extra support and makes it easier to unpack the items later.
How to Pack Pots and Pans
Use the “nest” technique to pack pots and pans. That involves packing each pan in size order to fit inside one another.
Choose a medium or large box for your pans, depending on the weight. Heavy iron pans may be too heavy to pack into one large container. Start by adding some lining to the bottom of the box.
After that, use packing paper to wrap each pan. Place in the box, starting with the largest and the bottom, and continue until you have the smallest pans at the top.
Don’t forget to wrap each item separately, which will help avoid scratching or other damage.
Secure space with extra crumpled paper. Wrap lids and detachable handles separately. However, try and pack them in the same box. This will save you time later trying to match covers and pans when you arrive at your new home.
Seal your boxes with packing tape, and label them before you move on to your next task.
How to Pack Kitchen Appliances
When you pack electrical appliances, check the instruction manual first. Sometimes you’ll get specific safety warnings about packing and transporting this kit.
Remove all detachable parts from your appliances. Don’t forget to check they are clean before you start packing. Toasters are often a problem here – and you don’t want to have a packing box full of crumbs!
Use bubble wrap or a moving blanket to secure each appliance in a box, and seal it with packing tape.
You’ll need extra preparation time to handle large items like refrigerators. It’s important to check the manual for these appliances. Remember to allow time to defrost freezers and clean the insides and backs.
Large items need specialist removal equipment, so it’s worth hiring a professional for this. It will help you avoid damage or injury. Label the boxes ‘this side up’ to ensure you aren’t storing appliances upside-down, which can damage them.
Packing Pantry Food
It’s not always worth the time and effort to move pantry items.
Check each container and pot to see if the item is open to see how much is left in the container. For cheap food products, throwing them away and buying new ones once you’ve moved is probably better.
Check the dates too. It’s common for more unusual ingredients to sit at the back of the pantry and expire. Throw these out instead of wasting time and money moving them.
Glass jars will need to be individually wrapped in bubble wrap. And open items will need taping to ensure they don’t spill.
However, you can stack the remaining items together in a small box. Remember to label the boxes. If there is anything that you use every day (like salt and cooking oil), pack them separately.
Conducting a Final Packing Check
When you’ve finished packing your kitchen items, carry out one final check. Check that each box is well-sealed using packing tape and has labels and color coding.
Check the box weight, and put a warning label on any heavy box. Check your cupboards and pantry space to ensure you haven’t left items behind.
Remember to check the space above high cupboards as it’s common for people to use the area up there for extra storage.
Loading and Transporting: Some Tips
Always place heavy boxes at the bottom of a stack when adding kitchen items to a moving truck. Fragile items should go at the top, and you’ll need to secure them to prevent sliding during the move.
On your moving day, place fragile boxes away from doors and walkways. That will help prevent any damage as people pass through.
Make sure you put your everyday items into the truck first. That will ensure they are the last boxes to appeal at your destination, making them easier to find.
Unpacking Tips
When moving kitchen items, ensure you take the same organized approach to unpacking. Begin by cleaning and preparing surfaces, including the inside shelves of cupboards.
Pack and assemble your appliances first. Next, plan where to store each of your kitchen items. Once you’ve done that, unpack each box individually, storing each away as you go.
Consider buying some handy storage gadgets such as spice racks. They will help you maximize your space.
If your time is limited, store away the boxes that contain items you don’t use that often. Instead, focus on unpacking the essentials.
How to Pack Kitchen Items: A Final Word
Use our guide on how to pack kitchen items to get you started on your move. Remember that good organization is key, so allow plenty of time to complete everything correctly.
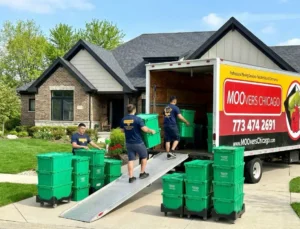
Professional movers always make a move less stressful. So if you want the easy approach, get in touch for a quote from our experienced moving team.